Are you looking to add charm and character to your home with a classic picket fence?
In this comprehensive guide, we’ll cover everything you need to know about picket fences – from the different types and materials needed for installation to a step-by-step guide on how to install one yourself.
We’ll also provide you with some useful tips to ensure a successful installation. Let’s get started on creating the picture-perfect picket fence for your property.
What Is A Picket Fence?
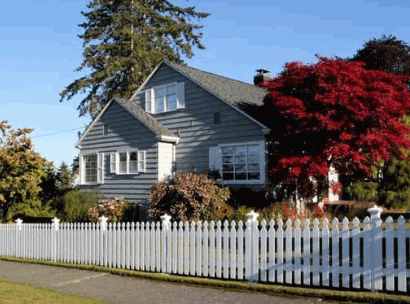
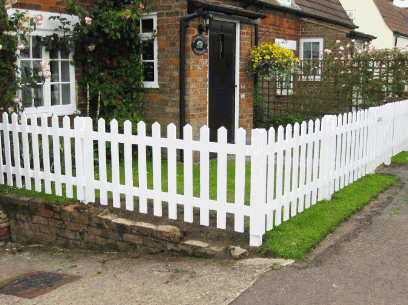
A picket fence is a type of boundary typically used to enclose a homestead or farmhouse, marking the garden area with evenly spaced upright boards called pickets, creating both an aesthetic and functional barrier.
Dig deeper: How Long Does It Take To Install A Vinyl Fence

What Are The Different Types Of Picket Fences?
Picket fences come in a variety of styles, including traditional white-painted models and those made from natural cedar with decorative post caps.
Regarding choosing between wood and vinyl for the construction of picket fences, one must consider the durability, maintenance requirements, and overall aesthetic appeal.
While wood offers a classic, rustic charm and can be easily customized with different shapes of pickets, vinyl fences are known for their low maintenance and long-lasting qualities.
The choice of decorative elements such as post caps can significantly enhance the visual appeal of the fence. Whether opting for a simple pyramid-style postcap or a more ornate design, these small details can make a big difference in the overall look of the fence.

What Materials Are Needed For Installing A Picket Fence?
To install a picket fence, you’ll need various materials including cedar pickets, 2X4s for the rails, 4X4 lumber for the posts, screws, and gate hinges for any access points.
Choosing cedar pickets for your picket fence is a wise decision due to their natural resistance to decay and insects, making them ideal for outdoor installations. Cedar is also lightweight yet sturdy, making it easy to work with while providing durability against the elements.
- You may also want to consider adding gate latches for security and easy access.
- Consider adding post caps to protect the exposed tops of the fence posts from weather damage, enhancing the overall look and longevity of your fence.

Step-By-Step Guide To Installing A Picket Fence
Installing a picket fence involves several steps that require careful planning and the right tools, such as a circular saw, brad nailer, and an air compressor to ensure precise and secure assembly.
Preparing The Ground
Preparing the ground involves clearing the garden area of any debris and leveling the surface, often using screening rock and pea gravel for proper drainage and stability.
Once the surface is cleared, a layer of screening rock is applied to provide a solid foundation. This helps to prevent shifting and settling of the ground over time. Following this, a layer of pea gravel is spread evenly to enhance the drainage system, allowing excess water to seep through without causing waterlogging issues. This combination of screening rock and pea gravel creates a stable base that supports the weight of structures or plants placed on top. Proper ground preparation ensures a long-lasting and healthy garden environment.
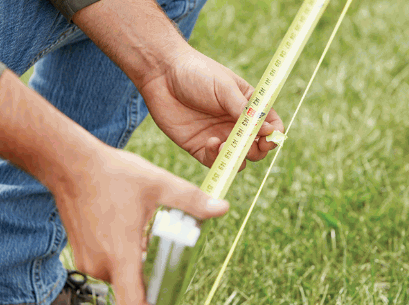
Measuring And Marking The Fence Line
Measuring and marking the fence line accurately is crucial, using stringers to ensure straight lines and marking where each post will be placed.
To measure the area where the fence will be installed, start by determining the total length of the perimeter. Using a tape measure, mark the corners and any changes in direction. Next, attach stringers between the marked points to establish a straight line and guide for post-placement. Make adjustments as needed to ensure the stringer is level and aligned correctly. By following these steps meticulously, you’ll set a solid foundation for the fence and ensure a professional-looking finish.
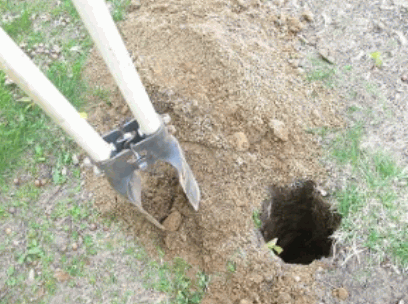
Digging Holes For The Posts
Digging holes for the posts is the next step, ensuring they are deep enough to provide stability and can be secured with screws once in place.
Regarding digging the holes for your posts, it’s crucial to get the depth just right. If the holes are too shallow, the structure may lack the necessary support, leading to instability. On the other hand, if the holes are too deep, it could potentially weaken the foundation.
To ensure you are digging at the correct depth, consider using a post-hole digger or an auger for larger projects. These tools can help you achieve consistent depth across all the holes.
After digging the holes, the next step is making sure the posts are level before securing them in place. A handy trick is to use a level tool on each side of the post to ensure it is perfectly upright. This step is essential for maintaining the overall structural integrity of your project.
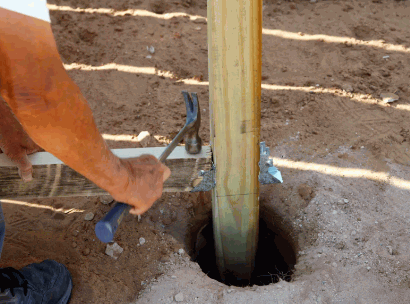
Setting The Posts
Setting the posts involves placing the 4X4 lumber into the holes, ensuring they are level and secure, and adding post caps for a finished look.
One crucial aspect of setting posts is the use of concrete to anchor the posts firmly in place. This not only provides stability but also prolongs the life of the fence or structure. By pouring concrete into the holes around the posts and allowing it to set, you create a strong foundation.
After the concrete has cured, it’s essential to double-check the posts’ alignment and adjust if needed to maintain a straight and uniform appearance. Adding decorative post caps not only enhances the aesthetic appeal but also offers protection against the elements, preventing water damage and extending the posts’ lifespan.
Installing The Rails
Installing the rails involves attaching the 2X4s to the posts using a brad nailer for a firm and precise fit.
Make sure to measure the exact length of the rails needed for your project, taking into account any corners or angles. Use a sturdy measuring tape for accuracy.
Then, mark the measurements on the 2X4s using a pencil, ensuring that they match up with the corresponding areas on the posts.
Next, carefully cut the rails to the correct size using a saw. Double-check the measurements before cutting to avoid any mistakes.
Once the rails are cut, position them against the posts, aligning them properly before securing them with the brad nailer.

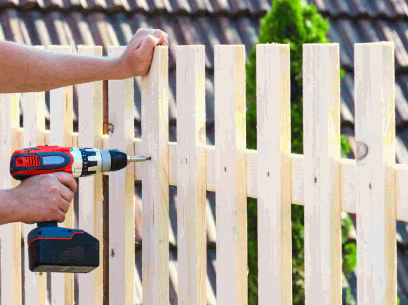
Attaching The Pickets
Attaching the pickets to the rails involves measuring, cutting with a circular saw, and securing each picket in place.
It is crucial to ensure that the pickets are evenly spaced along the rails for a uniform appearance. Typically, pickets are cut to a specific length, depending on the design of your fence. Make sure to measure and mark each picket before cutting to maintain consistency.
When cutting the pickets, a straight edge can be used to guide the circular saw for precision. Once the pickets are cut to the appropriate size, they can be attached to the rails using screws or nails. Predrilling holes may be necessary to prevent splitting when securing the pickets.
Tips For A Successful Picket Fence Installation
To ensure a successful picket fence installation, it’s important to follow certain tips such as painting or staining the fence for durability and sharing your project on Instagram for inspiration and feedback.
Use A Level To Ensure Straightness
Using a level is crucial when installing the posts and rails to ensure that every part of the fence is perfectly straight.
When setting up a fence, the level serves as a trusty companion to ensure that each post and rail align flawlessly. By positioning the level against the posts and rails, you can easily detect any deviations from the desired straight line. This meticulous process is essential for not only the aesthetic appeal but also the structural integrity of the fence. A properly leveled fence not only looks visually pleasing but also stands sturdy and strong against external forces. It prevents unsightly bends and leans that can compromise the functionality and longevity of the barrier.
Pre-Drill Holes For Nails Or Screws
Pre-drilling holes for nails or screws can prevent the wood from splitting and makes the assembly process easier and cleaner.
One of the key benefits of pre-drilling is that it reduces the chances of damaging the wood, especially when working with hardwoods or delicate materials. By using a Brad nailer or a drill bit that is slightly smaller than the nail or screw, you create a pilot hole that guides the fastener in smoothly. This not only ensures a secure hold but also minimizes the risk of the wood cracking or splitting during installation.
Pre-drilling allows for greater precision in positioning the nails or screws, resulting in a more professional and seamless finish. It is a simple yet essential technique that elevates the quality of your woodworking projects. To perform pre-drilling effectively, make sure to use the appropriate tools and follow the correct procedures to achieve optimal results.
Consider Using A Fence Panel For Easier Installation
Using pre-assembled fence panels can simplify the installation process, making it quicker to attach entire sections of pickets to the rails.
One of the advantages of opting for fence panels in your project is the time-saving benefit they offer. With pre-assembled panels, you can significantly reduce the time spent on constructing a fence as compared to individual picket installation. This streamlined process not only saves you time but also ensures consistent spacing and alignment.
Integrating fence panels into your design is relatively straightforward. Start by determining the layout and positioning of the panels along the fence line. Ensure the panels are evenly spaced and aligned with the posts. By following the manufacturer’s instructions and guidelines, you can seamlessly incorporate the panels into your overall fencing design.
Regarding secure attachment, it’s essential to properly fasten the panels to the posts and rails. Use quality screws or nails that are suitable for outdoor use to ensure durability. Check for any gaps or loose connections and make adjustments as needed to maintain the structural integrity of the fence.
Conclusion
A picket fence is a timeless addition to any homestead or farmhouse, providing both aesthetic charm and functional boundary definition for your garden.
Not only does a picket fence add a touch of classic elegance to your property, but it also serves practical purposes such as keeping unwanted visitors out and pets or children safely in. This type of fence is versatile, offering various styles and heights to fit different needs and preferences. The installation of a picket fence can increase the curb appeal and overall value of your home, making it a smart investment. The traditional look of a picket fence can transform a plain yard into a picturesque landscape, creating a welcoming environment for you and your guests.